FYP 2 - Layout Improvement

Recently I changed my laptop and the screen are become LED screen, and the yellow color of my layout design become too bright in LED screen, so that I started to improve it.


This is the final outcome, I darker the yellow color and added texture to it, hope that it is not too bright now but still can bring out the cheerful feeling.

Here are some different version in the progress:


At last I choose to not use any shadow to keep the design in simple minimal style.

The HOME page:


The ABOUT page:


The JOIN page:


I am still improving all the design because I prefer to settle the scripting part first.

By the way, I had purchase a domain for this project to go live,
check it out at: www.InfectionOfSmile.com 


FYP 2 - Programming Progress 3

After done the basic HTML layout and Flash function, I started to combine them and make the whole site dynamic with database.

First I convert all the html file to php file, created a config.php to connect to database and include in all the file.


Then I created a table called "photos" in phpmyadmin, used to store all the photos data submitted by users.


The structure for this table:

PhotoID - Unique ID for each photos, set as AUTO_INCREMENT
Name - The user's name
Description - The user's message
IsActive - To allow control for the data, which can set the photos that do not want to show as not active but no need to delete it, because maybe need it in future.
Created - The time that the data was created, using CURRENT_TIMESTAMP that can automatically use current time.


Then can started to try to insert data into the photos table.
I write the following script in the php file that integrate with the flash to create the jpg file:


When the file is accessed, the "INSERT" query insert dummy data into the photos table in the database. PhotoID as NULL because it can AUTO_INCREMENT and the main purposely is to let it generate a new id for the photos that going to save.

After insert the data, I used the "SELECT" query to get the data back to the php file, to use the PhotoID that just generated as the name for the .jpg image that going to save.

And it worked fine! So I can continue to the flash to create 2 input text for the users input.


And send the data to php file using "sendAndLoad" function in flash.


After that I get the data in php from the POST variables:


And use that variables to insert it into the database using the INSERT query justnow:


Then check the database, the data successfully inserted!


After that I need to get the data from database in the gallery page using the "SELECT" query.


and arrange the photos using css float properties so that it will arrange automatically.

FYP 2 - Programming Progress 2

After done the basic html, I started to working with the flash webcam function, which is the most complicated function in this project. The function required the integration between flash, php and mysql.

At first, I was searching related tutorial about capture image in flash and save as jpg but there are no much results for it. (Although using webcam in flash are quite common but wonder why there are no much tutorial for it, maybe is because save as jpg image require php knowledge)

Fortunately, I found some tutorial with source file provided:

- Access Webcam with Flash

- Captures images from the webcam and save them to the desktop

- Photo Booth – Flash Webcam Image Capture

Most of them are using AS3.0 but the "Access Webcam with Flash" tutorial by Kevin Musselman is using AS2.0 so I decided to refer to that because I am more familiar with AS2.0


The tutorial divided to many parts and explained each section of it, but some part are still quite hard to understand. The author was using script to create the button but I choose to create directly in flash stage.

To fully test the function, it required a server (I don't know how to call it) for the php file, so I installed XAMPP for apache localhost server. But I am having a big problem and stuck at there for a long time, the problem is no image are saved after clicked the save button. After keep on research and testing, I found out that was a stupid mistake. The author didn't provided the php file but provided the php code in his website, and I just copy paste it into my php file but forgot to put in the php tag ( < ?php ?> ), sure it won't work. After added the php tag, it worked!


After that, I started to add the "Free Transform" function that posted before into the flash.

Firstly I tried to put the object that can be transform directly on the stage in flash, but it can't be saved in the image. Then I tried to put it in the movieclip that hold the bitmap data when the image is captured, but it still didn't work.

After tired many way to fix this problem, I found a way to solve which is attach the movieclip dynamic into the movieclip that hold the bitmap data, and now it can be transform and save in the image.

FYP 2 - Programming Progress 1

*I accidentally replaced this post with Programming Progress 2, so need to rewrite again :(

------
I decided to convert the layout designed previously to HTML first to see how it looks and feel, and may help to improve the design.

At first I plan to do in XHTML & CSS which is the trend lately, but I found that my layout are very simple, using table should be enough for it.

So I started to do slicing in Photoshop, just simply slide out the images because the layout details will adjust in HTML.


Then I started to working on the HTML in Crimson Editor, a good free source editor.


- added < body style="margin:0;"> to make everything align in the center of the browser, no matter in what resolution.

- set the font family as Verdana,san-serif and font size as 16px which is quite big if compared to other common website, but I think bigger font size is easier for users to read.


*Feel like quite hard to do the bottom part which is grab random photos from the gallery and arrange it like the planned design, due to the irregular placement. But will try to find and think of some way to solve this problem, if cannot make it maybe just arrange it nicely or do it manually in Photoshop.


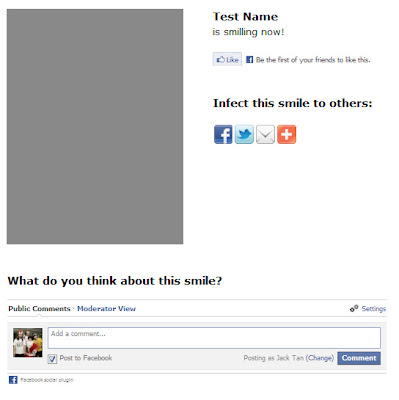
For the photo details page, I decided to use Facebook social plugin such as the Like Button, Share Button and Comment system, to make the users more convenience because no need to register an account just for vote or comment.


To integrate the Facebook social plugin in website, it required us to create a Facebook App first to get the appId


Then just using the script provided in http://developers.facebook.com/docs/plugins/


For the Share Button, I choose to use plugin from http://www.addthis.com/ to support for more services like tweeter and email.

FYP 2 - Idea Development

I had search the internet and found some example for what I plan to do, which is the add graphics in the photo after taken it.


But it doesn't really looks funny right? and I think if it is really funny, that is not the feeling that i want for. I will prefer a simple and warm feeling instead of this kind of funny. So again I decided to back to simple, cancel the add graphic function. But, there are some replacement for it, which is add in some texts to it.

Something like this:


I think text can help to convey the message or feeling more clearly in supporting the photos. After some consideration, I decided to do this in a way that users can click a button and it will generate random quote in the photos. Because some users may not have the idea for the texts and I want to make the process as simple as possible, which can done easily.